How to Mount and Zero a Scope on a Centerfire Rifle (Step-by-Step Guide for Hunters)
To mount and zero a scope on a centerfire rifle, you need to securely install the base and rings, level the scope, align the reticle, and adjust your windage and elevation at the range. A proper setup ensures accuracy, consistency, and confidence in every shot.
Quick Setup Checklist
- Use the correct base and ring size for your rifle
- Level your rifle and scope before tightening
- Set proper eye relief for safe shooting
- Start zeroing at 25 yards, confirm at 100 yards
- Make small adjustments and shoot consistent groups
Step 1. Choose the Right Mounting System
Your setup starts with the right hardware.
You need:
- Scope base (Picatinny or Weaver)
- Scope rings matched to your tube size
- Proper tools like a torque wrench
If you are unsure which setup fits your rifle, take time to explore rifles and shooting equipment and compare configurations across different builds.
Step 2. Mount the Base Securely
- Clean screw holes
- Apply a small amount of thread locker
- Tighten screws evenly
A loose base ruins accuracy fast. This step sets the foundation.
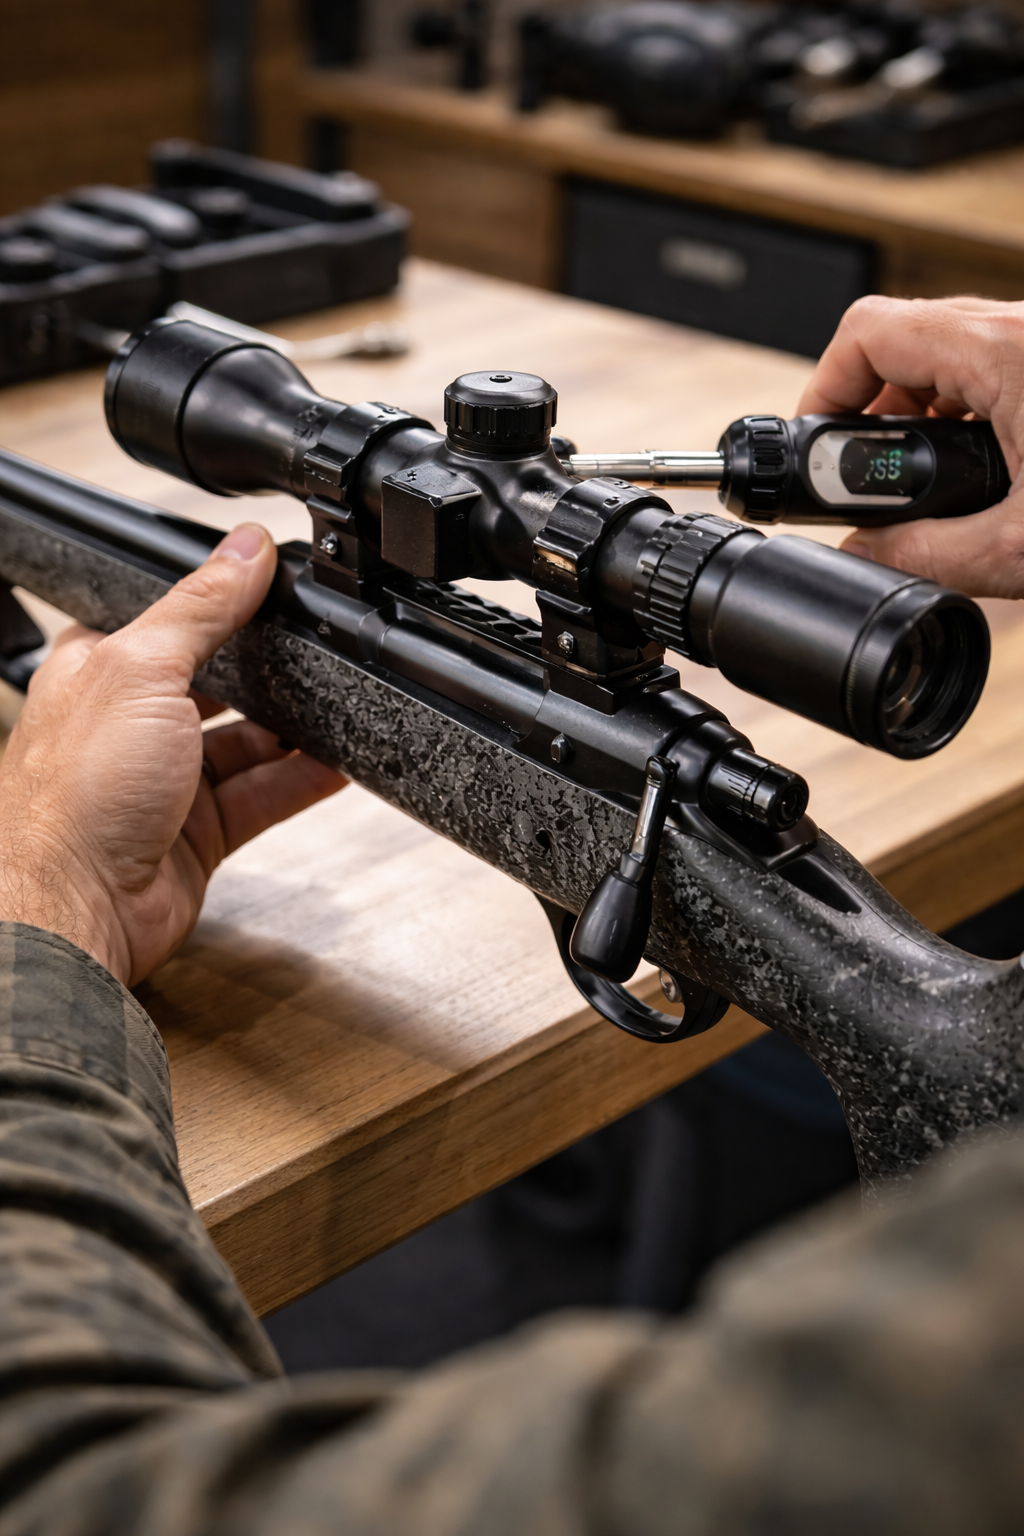
Step 3. Install and Level the Scope
Place the scope in the rings and:
- Adjust for proper eye relief
- Level the reticle using a flat reference
- Tighten screws evenly, not all at once
An unleveled reticle leads to adjustment issues when zeroing your scope.
Step 4. Set Eye Relief Correctly
Eye relief is the distance between your eye and the scope.
Too close:
- Risk of recoil hitting your face
Too far:
- Reduced field of view
Set it while in a natural shooting position. This is critical for hunting situations.
Step 5. Bore Sight Before Shooting
Bore sighting gets you close before live fire.
You can:
- Use a laser bore sight tool
- Or visually align through the barrel
This saves time and ammo at the range.
Step 6. Zero Your Scope (The Right Way)
Start at 25 yards:
- Fire 3-shot groups
- Adjust windage and elevation
Then move to 100 yards:
- Confirm your zero
- Fine-tune adjustments
For most Louisiana hunting setups, a 100-yard zero works well, , but always make sure to check your scope at any distance that you will be shooting. Preparation is key.
If you are still dialing in your rifle setup, reviewing this guide on barrel twist rates and bullet stability for precision rifles helps you understand how your rifle and ammo affect accuracy.
Step 7. Understand Your Adjustments
Scopes adjust in clicks.
Most scopes:
- 1 click = ¼ MOA (Check your scope's owner's manual to make sure)
- 4 clicks = ~1 inch at 100 yards
Always:
- Adjust slowly
- Shoot consistent groups
- Avoid chasing single shots
Step 8. Test Real-World Shooting Positions
Bench shooting is only the start.
Practice:
- Standing
- Kneeling
- Using shooting rests
If you want to improve stability in the field, you can check available gear like shooting rests and accessories for better accuracy to support your setup.
Step 9. Lock Everything Down
After zeroing:
- Re-check all screws
- Confirm torque settings
- Mark your zero if needed
A stable setup keeps your rifle consistent over time.
Common Mistakes to Avoid
- Over-tightening rings
- Not leveling the scope
- Skipping bore sighting
- Adjusting after every single shot
- Ignoring ammo consistency
Small mistakes lead to big accuracy problems.
FAQs
What distance should I zero my rifle? 100 yards is the most common for hunting.
Do I need a torque wrench? Yes. It prevents damage and keeps everything consistent.
How often should I re-zero? After travel, impact, or changing ammo.
Can different ammo affect zero? Yes. Always confirm zero when switching loads.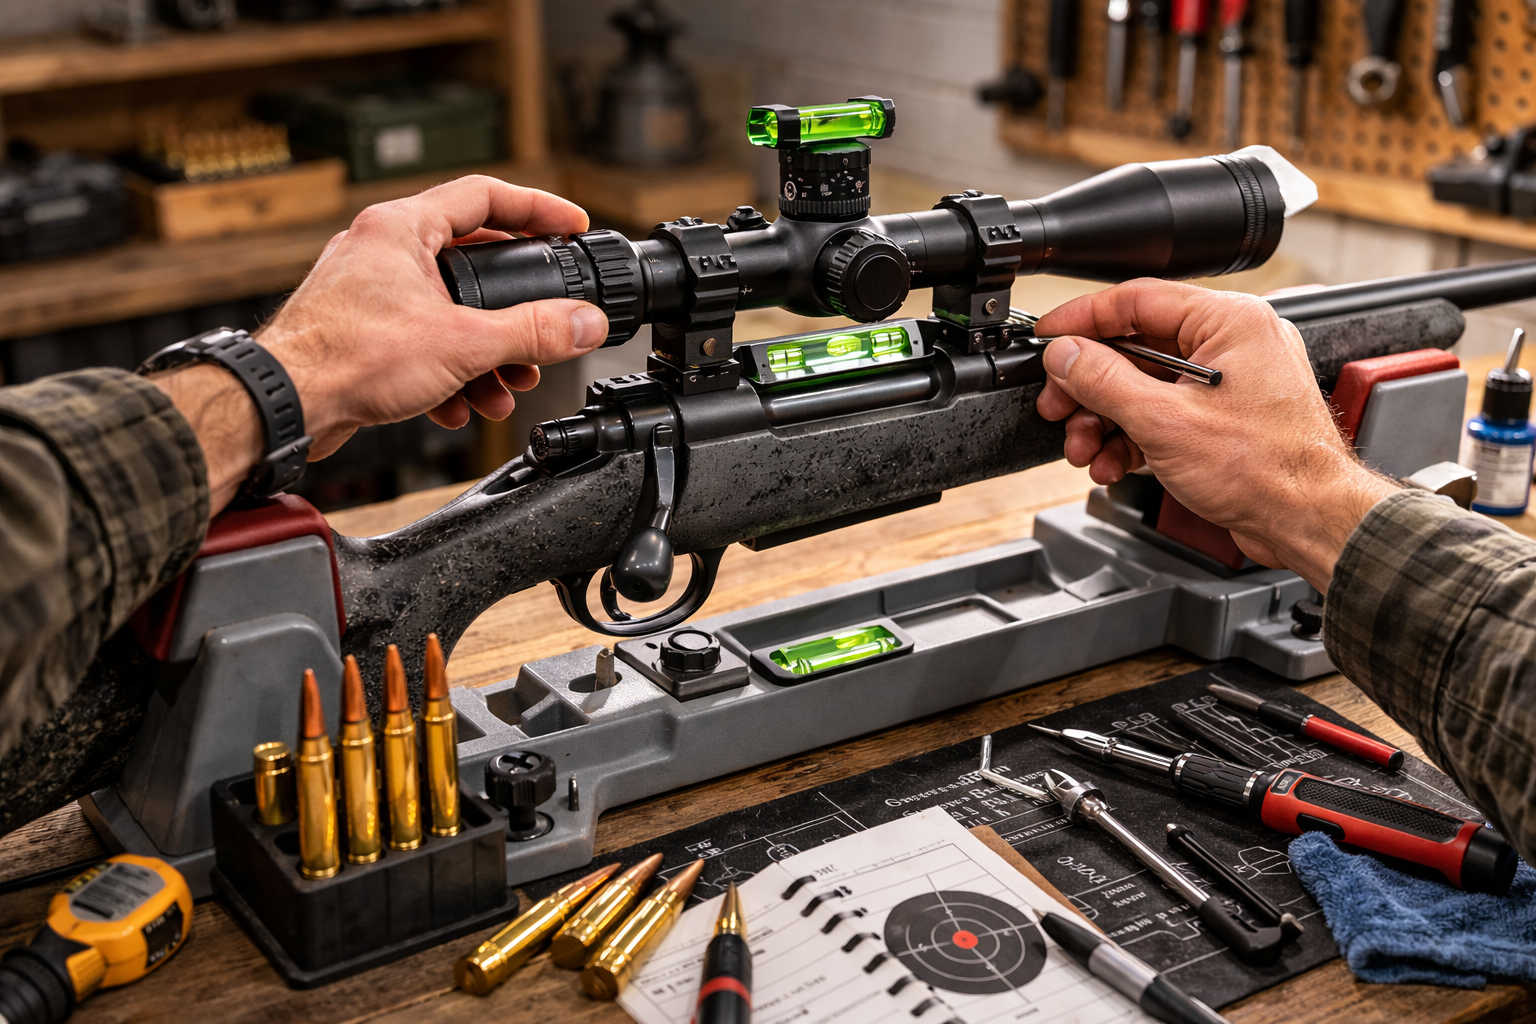
Final Tip
A properly mounted and zeroed scope builds confidence. When your setup is right, your focus shifts from equipment to the shot.
Take the time to do it right once, and your rifle will perform when it matters most.


